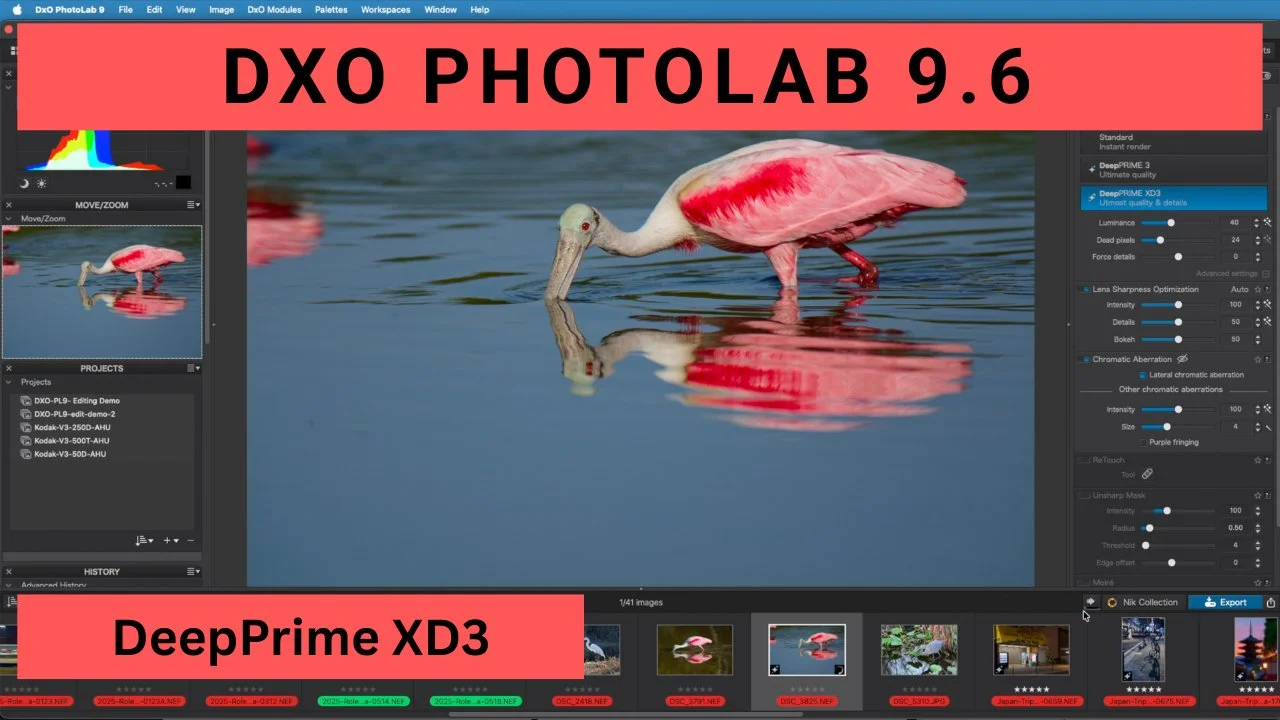
DxO PhotoLab 9.6 Just Dropped — And It’s a Massive Leap for Every Photographer
I’ve been using DxO PhotoLab since version 8, and every major update has made me faster and happier in the digital darkroom. But PhotoLab 9.6 feels different — it’s the first version that genuinely feels built for 2026 shooting habits: huge file counts, mixed sensor libraries, and the constant battle between noise and detail.
Here’s exactly what changed and why I’m excited.
DeepPrime XD3 – Noise Reduction That Finally Works on Every Camera
The headline feature is massive: DeepPrime XD3 is no longer limited to specific sensors. It now works on every sensor — old DSLRs, Fujifilm X-Trans, Olympus, Nikon, Sony, Canon, you name it. I threw it at some tough real-world files:
Handheld night shots at ISO 6400
ISO 12,800 bird photography with busy backgrounds
Even a low-ISO 140 image
The noise simply vanishes, yet fine detail stays perfectly intact.
High-Fidelity Compression – Turn 55 MB RAWs into 19 MB DNGs with Zero Quality Loss
This one genuinely surprised me.
A 24 MP Nikon ZR file (17.1 MB) compresses down to a 4.7 MB DNG.
A 45 MP Nikon Z8 file (55.1 MB) becomes just 19 MB.
That’s roughly 3–4× smaller with no visible degradation at all. All metadata, all adjustments, everything stays 100% intact. For wedding shooters, travel photographers, or anyone handling 10,000+ image jobs, this is a storage and backup game-changer.
AI Mask Diffusion Slider – Finally, Pro-Level Mask Blending
This is the feature I didn’t know I needed until I used it. The new 0–100 Diffusion Slider controls exactly how soft the edge of any AI mask (People, Background, Sky, etc.) becomes. At 0 it’s razor-sharp; at 20–50 it blends naturally so your exposure, ClearView Plus, or color adjustments never create obvious cut lines. I tested it on an Olympus E-M1 Mark II image where the background was too bright and the subject too dark. One quick slider pull and the transition across the jacket hood is buttery-smooth. Combine it with DeepPrime XD3 and you get clean, natural-looking edits in seconds.
Conclusion
If you’re still on PhotoLab 8 or earlier, 9.6 is worth the upgrade for any one of these three features. Together they make RAW editing faster, smaller, and more precise than ever.
Special offer for readers
Save 15% on DxO PhotoLab 9.6 (and other DXO software) with code EDALDRIDGE15
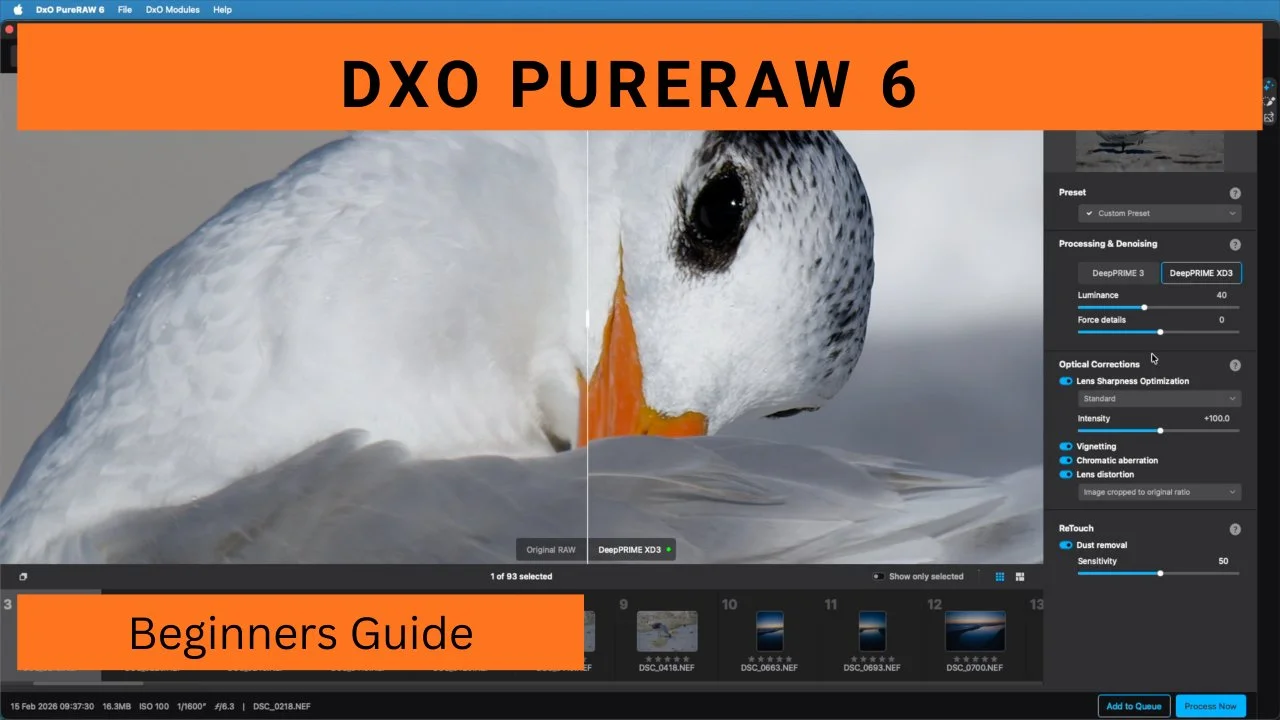
Beginners Guide to DXO PureRAW 6
Hey there, fellow photography enthusiasts! I'm Ed Aldridge, and if you're like me—always chasing that perfect shot while dealing with the realities of high-ISO noise, lens distortions, and pesky sensor dust—then I've got something exciting for you. I just released a new video on my YouTube channel: a comprehensive beginner's guide to DxO PureRAW 6. This powerful RAW preprocessing tool has been a game-changer in my workflow, and in the video, I break it all down step by step. If you haven't watched it yet, check it out
In this blog post, I'll expand on the key highlights from the video, share some additional tips, and explain why PureRAW 6 might just become your new best friend in post-processing. Whether you're a newbie dipping your toes into RAW editing or a seasoned pro looking to streamline your process, this tool delivers professional-grade results with minimal fuss. Let's dive in!
What is DxO PureRAW 6 and Why Should You Care?
DxO PureRAW 6 is essentially a pre-editor for your RAW files. It handles the heavy lifting of noise reduction, lens corrections, and demosaicing before you import into your main software like Lightroom, Photoshop, or even DxO's own PhotoLab. No need for catalogs or complicated databases—just drag and drop your folders, apply settings, and export clean, optimized files. It's lightweight, efficient, and now packed with AI smarts that make it feel like magic. In the video, I demonstrate how easy it is to get started. For beginners, the interface is intuitive: select your images, tweak a few sliders, and let the software do its thing. The best part? It processes conservatively, preserving details so you have plenty of room for creative edits later.
Key Features That Make PureRAW 6 Stand Out
Here's a breakdown of the standout features I cover in the video, with some extra insights:
1. DeepPRIME XD3 Denoising: Tackle Noise Like a Pro - This is the star of the show. DeepPRIME XD3 uses advanced AI to reduce noise while sharpening details, now supporting both Bayer and X-Trans sensors (great for Fuji users!). In my demo, I take a high-ISO shot (like ISO 12800 from my Nikon Z) that's riddled with noise and transform it into a crisp, clean image. The XD3 variant is a bit slower—expect a few extra seconds per file—but the results are worth it for those challenging low-light scenarios.Tip: If speed is your priority for less noisy files, stick with the standard DeepPRIME 3. I recommend testing both on a sample image to see the difference.
2. DNG High Fidelity Compression: Save Space Without Sacrificing Quality - Storage woes? PureRAW 6's new compression tech shrinks your DNG exports dramatically—I've seen a 17MB RAW file drop to just 6MB with zero loss in fidelity. This is perfect for archiving large shoots without filling up your hard drives. In the video, I show a side-by-side comparison: original RAW vs. compressed DNG. The detail retention is impressive, making it ideal for pros who shoot thousands of frames.
3. Improved Batch Processing: Efficiency for Big Projects - Gone are the days of waiting idly. PureRAW 6 now parallelizes tasks, queuing the next image while the current one processes. For a batch of 50+ images, this can cut your wait time by up to 50%. I put it to the test with a mix of ISO 100, 3200, and 12800 files, and the speedup was noticeable. Pro Insight: Use custom presets to apply your favorite settings across batches. In the video, I create one for wildlife photography that amps up noise reduction while keeping sharpening subtle.
4. Automated Spot Removal: Say Goodbye to Dust Bunnies - This AI-driven feature is a lifesaver! It detects and removes sensor dust automatically, with a sensitivity slider to fine-tune (I suggest starting at 50 to avoid mistaking water droplets or textures for dust). My before-and-after on a driftwood shot with bird details shows how it cleans up without overdoing it—truly upgrade-worthy.
Real-World Demos and Results
In the video, I walk through processing real Nikon Z RAW files, including split-screen views of noisy high-ISO images turning into masterpieces. We cover everything from importing folders to exporting to Lightroom or PhotoLab 9. The conservative approach ensures your files are prepped but not overcooked, leaving the artistic decisions to you.If you're new to RAW, this is your entry point—no overwhelming options, just results.
Final Thoughts and a Special Offer
DxO PureRAW 6 isn't just software; it's a time-saver that lets you focus on what you love: capturing and creating stunning photos. After using it on my recent shoots, I can't imagine going back. If you're ready to level up, head over to DxO's site and use code EDALDRIDGE15 for 15% off any DxO software, including PhotoLab 9.What do you think? Have you tried PureRAW 6 yet?
Drop a comment below, watch the full video for the hands-on demo, and subscribe to my channel for more photography tips, vlogs, and gear reviews. Let's keep the conversation going!
#DxOPureRAW6 #RAWEditing #PhotographyTips #NoiseReduction #DigitalPhotography
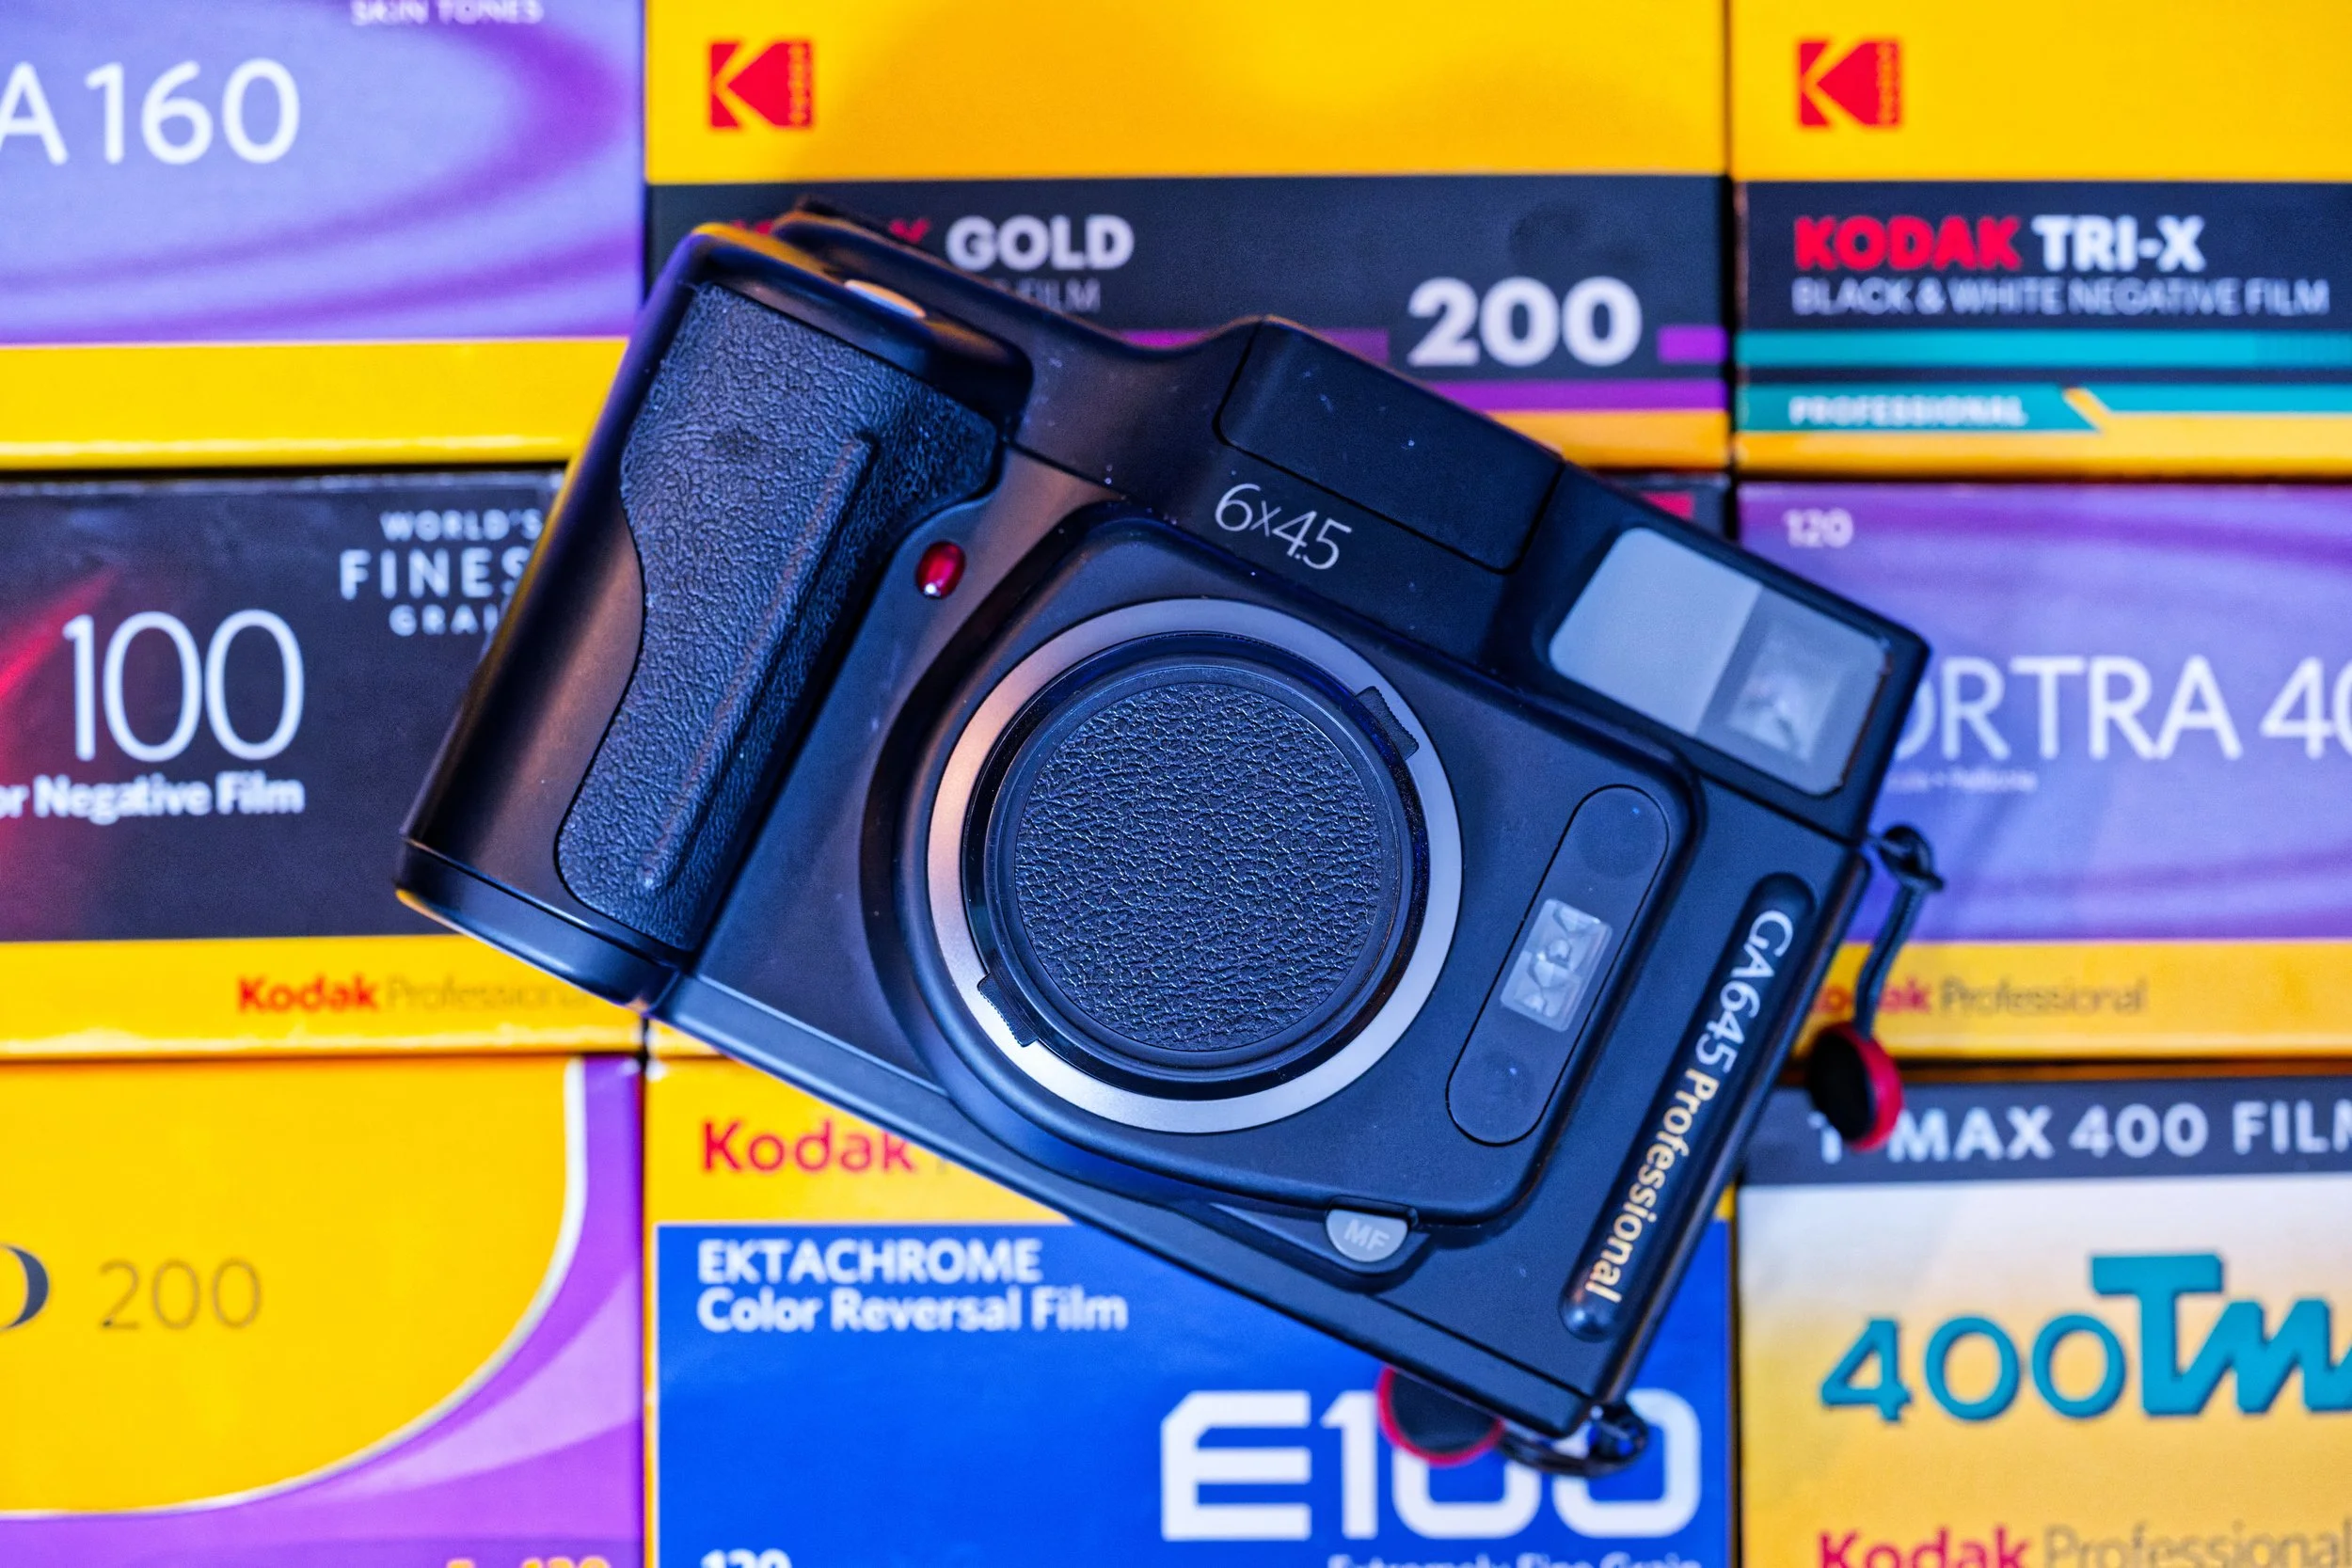
Fujifilm GA645 Professional Review: Medium Format Magic in 2026?
If you're a fan of film photography, vintage gear, or just love that analog vibe, I've got something special for you. I recently uploaded a video review of the Fujifilm GA645 Professional on my YouTube channel, diving deep into why this 1995 medium format camera is still turning heads in 2026. In this accompanying blog post, I'll break down the key highlights, share some thoughts, and hopefully inspire you to pick up some film and hit the streets.
A Bit of History
The Fujifilm GA645 Professional was released back in 1995, marking a pivotal moment in medium format photography. It was one of the first autofocus medium format cameras, bridging the gap between fully manual systems and more automated point-and-shoots. Part of a series that includes variants like the GA645W (wide-angle) and GA645Zi (zoom), this model shoots in the 6x4.5 format, making it portable and user-friendly compared to bulkier medium format beasts. At a time when digital was just starting to emerge, Fuji aimed this at professionals and enthusiasts who wanted quality without the hassle.
Build Quality and Ergonomics
Weighing in at just 815g, the GA645 is remarkably compact for a medium format camera – think something closer in size to a 35mm SLR like the Nikon F5. It's got a plastic body that might feel a tad cheap to some, but it's durable and features a rubberized grip for secure handling. Perfect for street, travel, or portrait work where you don't want to lug around heavy gear. In my video, I show how it feels in hand – lightweight yet solid, ideal for on-the-go shooting.
Controls, Metering, and Features
The controls are intuitive: dials for shutter speed, aperture, and shooting modes (program, aperture priority, manual). You'll find exposure compensation up to ±2 EV, a self-timer, ISO adjustment, and even data imprinting for dates or settings on your negatives. The center-weighted metering system is reliable, covering EV 3 to 18, which handles most lighting situations without issue. It runs on CR123A batteries, and film loading is a breeze with automatic advancement. There's also a hot shoe for flash sync.
Autofocus and That Stellar Lens
The hybrid autofocus system combines infrared for close subjects and phase detection for farther ones, with a minimum focus distance of 0.7m. It's snappy most of the time, though it can have quirks in low light – that's where the manual focus zone system comes in handy. The star of the show is the Super EBC Fujinon 60mm f/4 lens, equivalent to about 35-37mm in 35mm terms. It's razor-sharp, with minimal distortion, vibrant Fuji colors, and creamy bokeh. Whether you're capturing portraits or street scenes, the image quality punches way above its weight, especially when scanned.
Pros and Cons
Pros:
Super compact and lightweight for medium format.
Excellent automation makes it beginner-friendly.
Sharp lens with that classic Fuji color pop.
Great for travel, street, and portraits.
Cons:
Fixed lens limits versatility (no swaps here).
Plastic build might not feel premium.
Autofocus can struggle in dim conditions.
Operation is a bit noisy, and it's fixed in portrait orientation.
Overall, the pros far outweigh the cons if you're into analog photography without overcomplicating things.
Is It Worth It in 2026?
Absolutely! In a world dominated by digital, the GA645 offers a refreshing analog experience with medium format quality at a fraction of the cost of modern equivalents. Hunt one down on the used market – they're still a steal for film enthusiasts. If you love the tactile feel of film and want stunning results, this camera delivers magic every time. Thanks for reading – now go watch the video!

Capturing Epic Shots in Hawaii Volcanoes National Park: Sunset at Holei Sea Arch and Nighttime Lava Glow
Hey everyone, if you're passionate about landscape and nature photography, my latest YouTube video dives deep into one of my favorite spots: Hawaii Volcanoes National Park. In the video I share practical tips for photographing the stunning Holei Sea Arch at sunset and the mesmerizing lava glow at Halema'uma'u crater under the stars. This blog post expands on those ideas, providing more details to help you plan your own adventure. Whether you're shooting film or digital, these hacks will elevate your shots. Let's break it down!
Planning Your Photography Trip to the Park
Hawaii Volcanoes National Park is a photographer's dream, blending dramatic coastal scenes with volcanic wonders. To make the most of it, dedicate at least two days—one for daytime exploration and another for night shoots. The entry fee is $30 per vehicle, and no special permits are required for basic photography (drones are a no-go, though). As of early 2026, the main visitor center is under renovation, so head to the temporary setup at the Kilauea Military Camp (KMC) about a mile away. Pack essentials like layers for chilly evenings (it can drop to the 50s°F), plenty of water, a flashlight or headlamp, sturdy shoes, bug spray, and sunscreen. Download the NPS app for offline maps and real-time alerts, and check the USGS website for eruption updates—Kilauea has been active sporadically since December 2025. For the ultimate half-day itinerary, start with the Holei Sea Arch for sunset, then drive to the crater overlooks for lava glow after dark. The park is open 24/7, so timing is flexible. Avoid common pitfalls like wandering off-trail (volcanic fumes and unstable ground are real hazards) or forgetting to monitor weather for clear skies. January offers fewer crowds, making it ideal for serene shoots.
Essential Gear for Iconic Shots
Keep your setup lightweight since you'll be hiking. A DSLR or mirrorless camera is perfect, paired with a versatile zoom like 24-120mm for wide landscapes or a prime 28mm for expansive views. Bring a telephoto lens (100-400mm) for zooming in on lava details. Must-haves include a sturdy tripod for long exposures, polarizing and ND filters to manage light, extra batteries (cold drains them fast), and a rain cover for sudden showers. Apps are your best friends: PhotoPills for predicting sun positions and Milky Way alignments, the NPS app for navigation and USGS for safety alerts. This combo ensures you're prepared without overpacking.
Photographing Holei Sea Arch at Sunset
The Holei Sea Arch, at the end of the Chain of Craters Road (a 20-30 minute drive from the visitor center), is iconic for its rugged rocky formation framing the ocean. Arrive 1-2 hours before sunset—in December 2025, that's around 4-5 p.m., with the sun dipping at 5:55-6:00 p.m. The golden light transforms the waves into a dramatic spray, perfect for silhouettes and dynamic compositions.Use the rule of thirds to position the arch off-center, incorporating foreground rocks or crashing waves for depth. For techniques: Freeze motion with fast shutters (e.g., 1/250s) or blur water for a silky effect (1 second at ISO 32, f/36—add an ND filter for 10-20 seconds). Shoot in aperture priority or manual at f/8-f/11, base ISO 100, and focus one-third into the scene for sharp details. Experiment with long exposures to smooth the sea or capture bold outlines against the fiery sky.
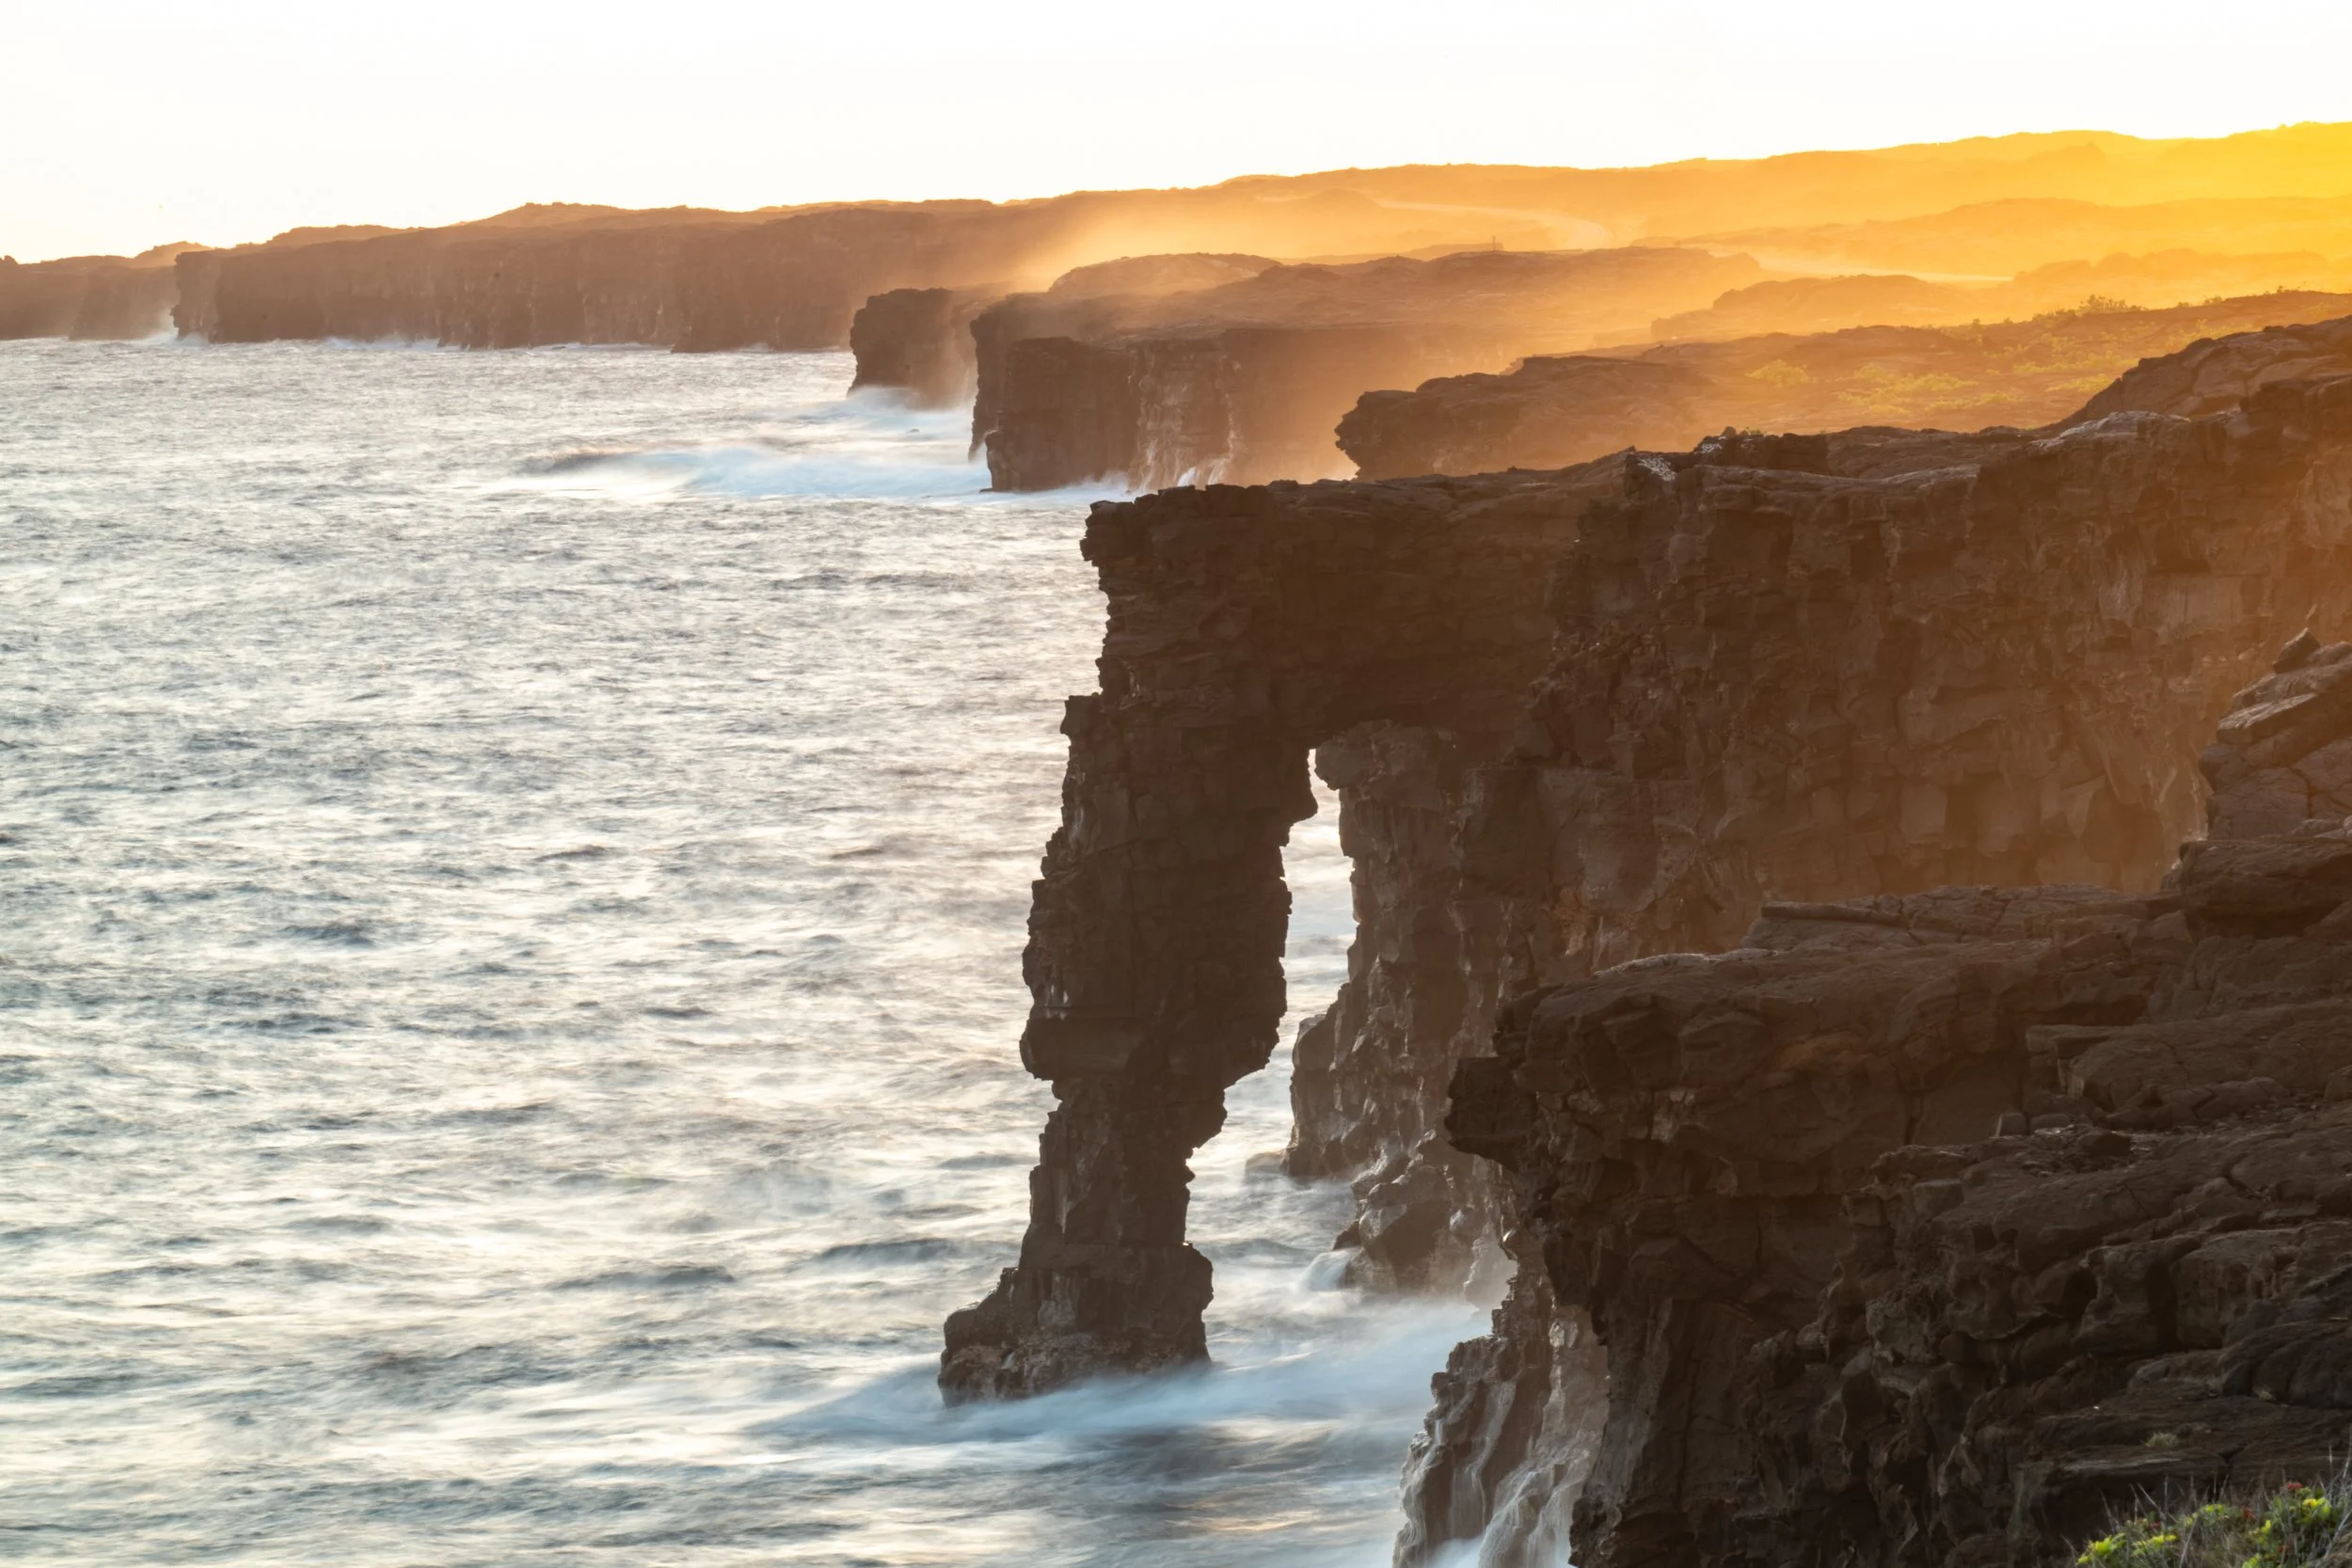
This spot's magic lies in its accessibility—minimal hiking required—yet it delivers spectacular results with the right timing.
Capturing the Lava Glow at Night
After sunset, head to overlooks like Uekahuna Bluff or Keanakākoʻi for the Halema'uma'u crater's orange-red glow. Wait until full dark (7-9 p.m.) on clear nights for the best contrast against the starry sky. Park at the Devastation Trail lot, then walk the old Crater Rim Drive to a roped-off dirt path—use a red-light headlamp to preserve night vision. Set up on a tripod and switch to astro mode for focusing. Frame the glow with the horizon and sky; PhotoPills helps align the Milky Way. Settings: Aperture priority, widest aperture (f/2.8-f/4), ISO 3200-5000, manual focus via live view, and self-timer to avoid shake. Shutter speed follows the 500 rule (500 / focal length, e.g., 17 seconds for 28mm) to keep stars sharp—adjust for crop sensors. Go wide for context or zoom for molten details. For star trails, try bulb mode for 10-20 minutes.
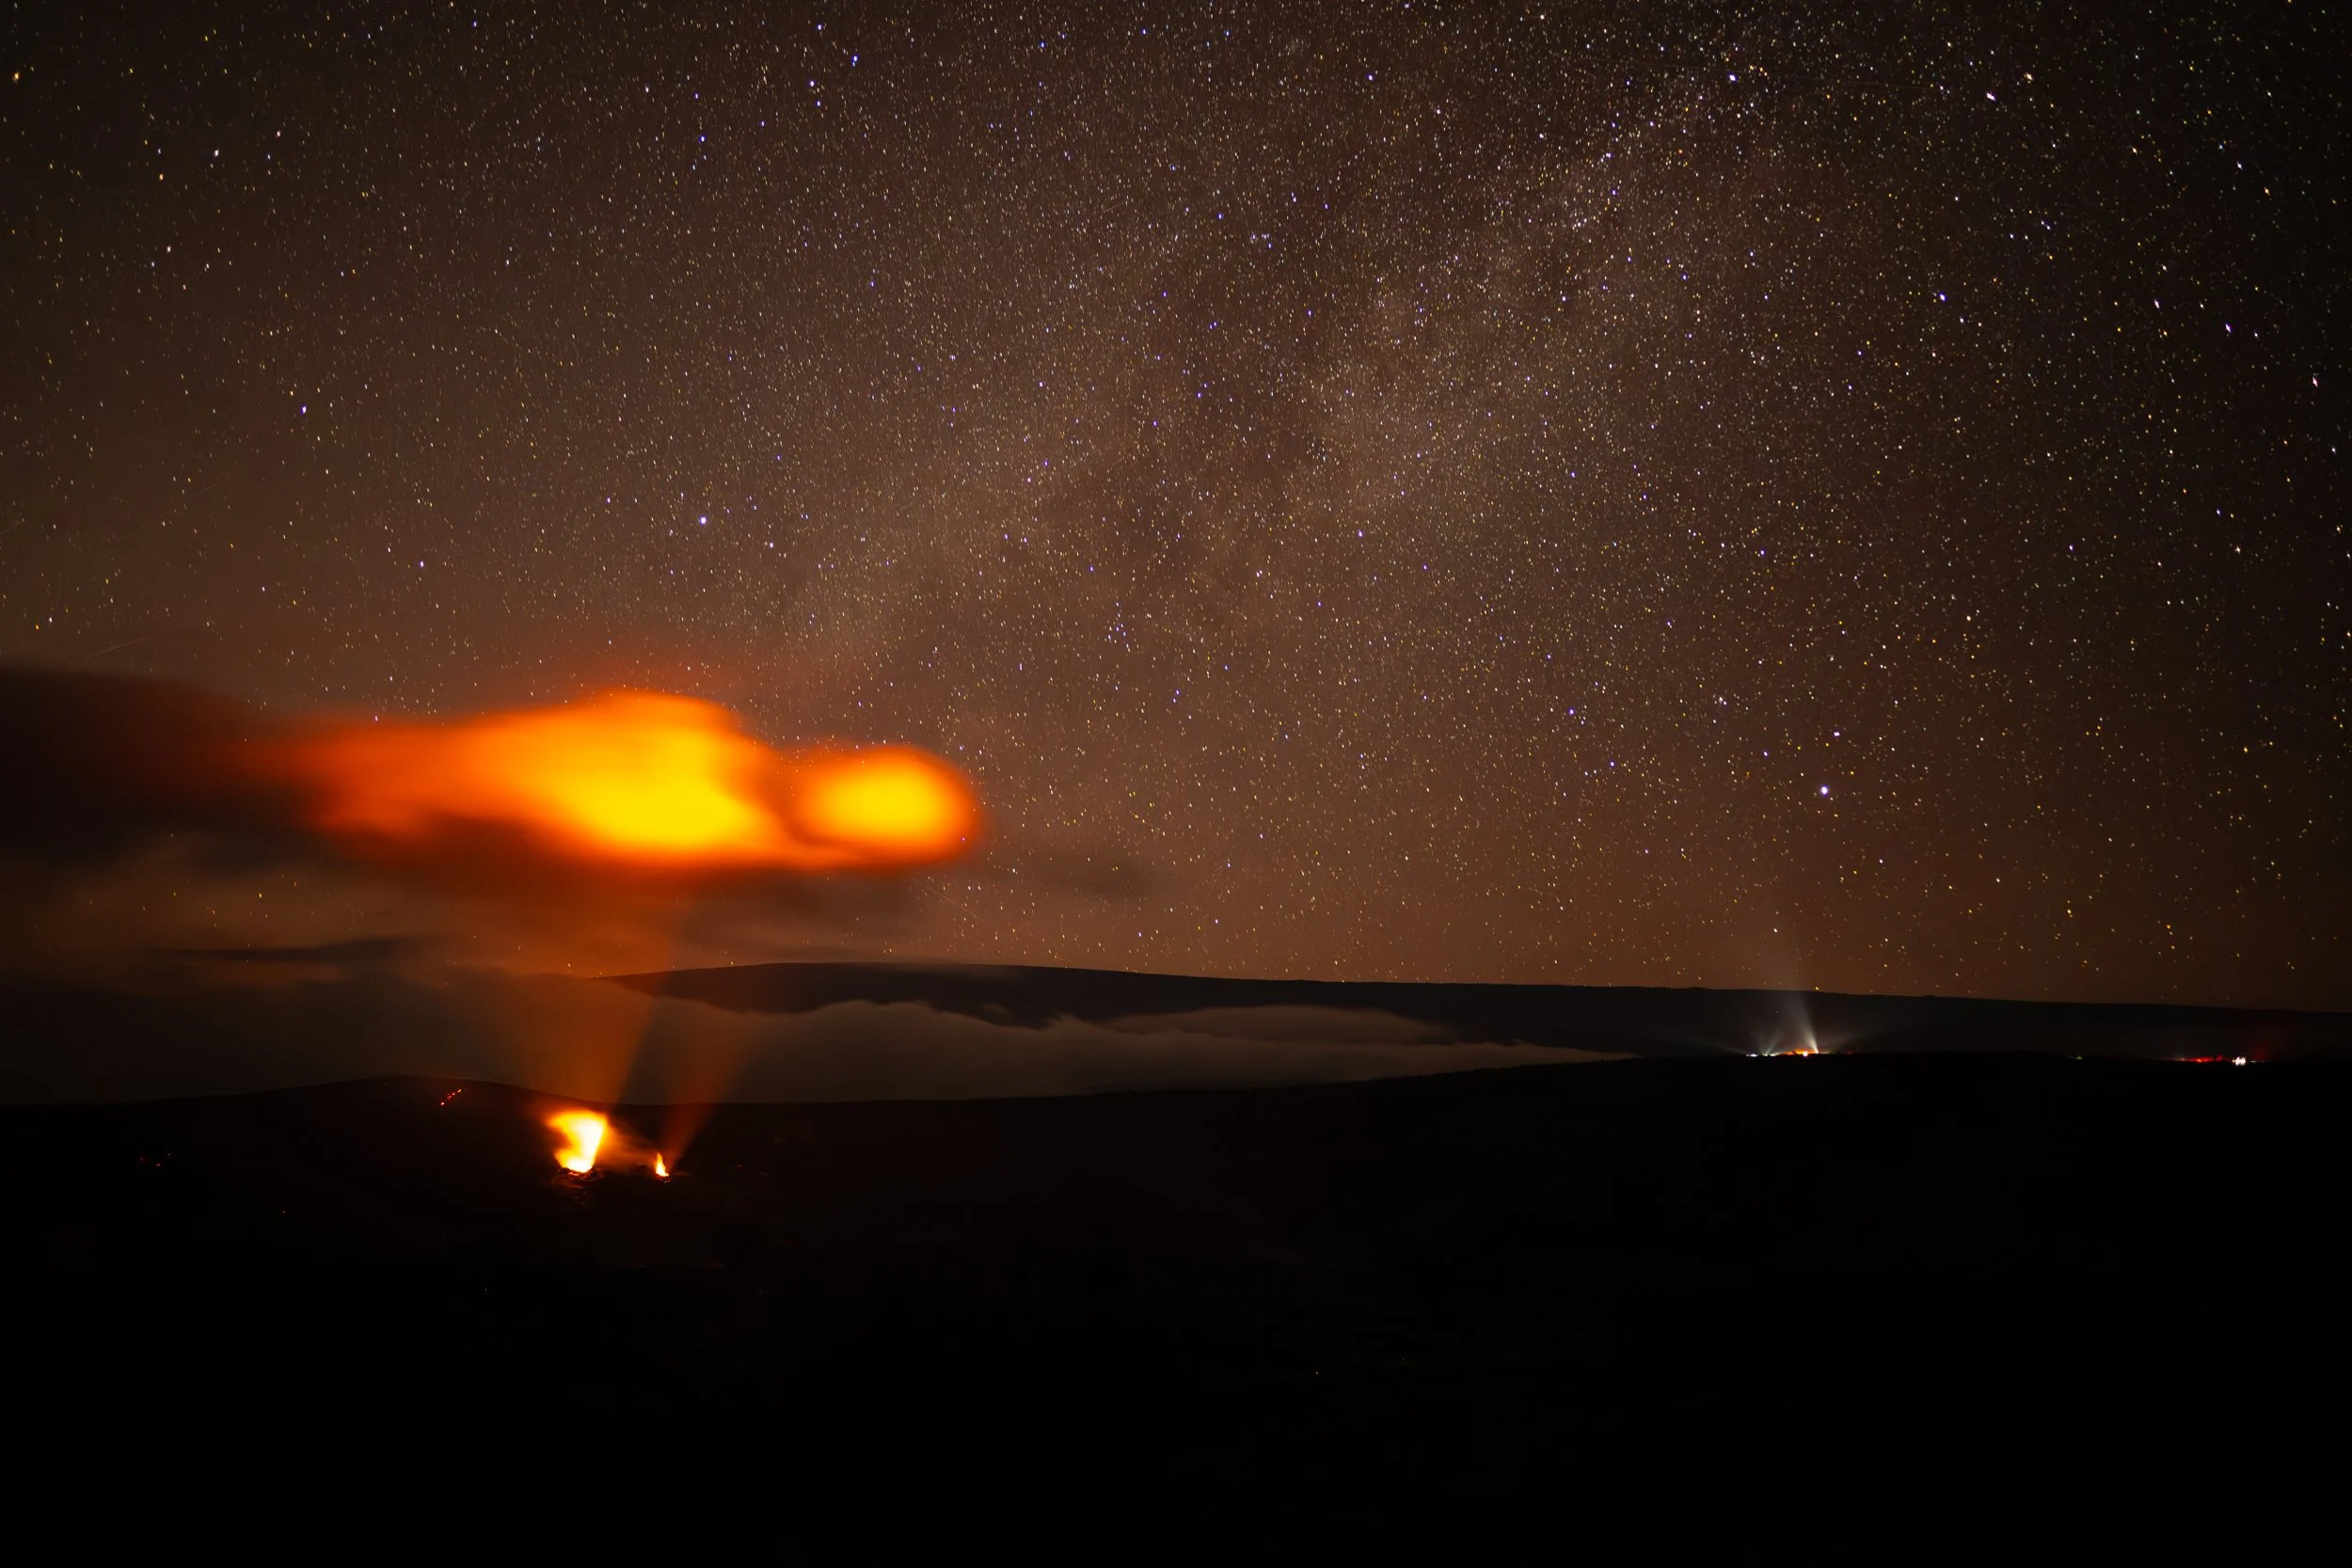
Lava glow and the Milky Way at Halema'uma'u crater.
Post-Processing with DxO PhotoLab 9
Back home, elevate your RAW files in DxO PhotoLab 9. Start with a flat camera profile, then apply subtle defaults: Smart Lighting at 15 for balanced exposure, ClearView+ at 10-24 for natural detail enhancement (great for Milky Way pops). In the Color tab, choose Vivid rendering to boost without oversaturating—avoid Vibrant for lava shots to prevent unnatural oranges. Use HSL tools to tweak orange saturation and luminance for that perfect glow. For high-ISO noise (common in night shots), Deep Prime XD works wonders, cleaning up ISO 5000 images effortlessly. Reduce highlights if the glow overwhelms, and remember: Less is more for authentic edits. Try it yourself—use code EDALDRIDGE15 for 15% off any DxO software, including PhotoLab 9.
Final Thoughts
Hawaii Volcanoes National Park proves you don't need days of trekking for epic photos; a well-planned 4-hour window can yield sunset drama and volcanic fire under the stars. The video covers these tips in action, with real-time demos to inspire your next trip. If you enjoyed this, subscribe to my channel for more photography guides, and share your shots using #VolcanoesParkPhotos or #HawaiiPhotography. What's your favorite national park shot? Drop a comment below! Gear up and chase that light—happy shooting!

Effortless Japan Camera Buys: Your Ultimate Vacation Hacks Guide
If you're a photography enthusiast planning a trip to Japan, the idea of snagging a dream camera—tax-free and hassle-free—might sound too good to be true. But as I shared in my recent YouTube video, it's not only possible but surprisingly straightforward. In this companion blog post, I'll expand on the key steps from the video, drawing from my own experience picking up a pristine used Nikon FM3A during a family vacation. Whether you're into film or digital, these tips will help you navigate the process, avoid customs pitfalls, and bring home gear without breaking the bank. If you haven't watched the video yet, check it out below for a visual walkthrough!
Why Buy a Camera in Japan?
Japan is a photographer's paradise, with stores packed full of high-quality new and vintage gear at competitive prices. From bustling spots in Tokyo and Osaka to hidden gems like the one I visited in Namba, you'll find honest sellers offering clean, well-maintained cameras. Plus, the tax-free perks for tourists can save you 10% right off the bat. In my case, after hunting through several shops, I landed on an excellent FM3A with a 35mm lens—total process took under an hour, and I walked away thrilled.
Step 1: Research and Select a Store
Start by targeting licensed tax-free stores like Bic Camera, Yodobashi Camera, or Kitamura Camera (the one I used in Osaka). These are ubiquitous in major cities and often have English signage or helpful staff. Look for "Tax Free" signs or simply ask—language barriers aren't a big issue, as gestures and apps like Google Translate can bridge the gap.
Key considerations:
Voltage Compatibility: Japan uses 100V; the US is 120V. Most modern cameras are dual-voltage, but confirm or grab an adapter.
Personal Use Only: No resale intent—stick to what you need.
Vintage Options: Places like Akihabara are great for used gear, but avoid restricted items (e.g., certain batteries or military-spec tech, though rare for consumer cameras).
No paperwork needed here beyond your passport. Pro tip: Research stores via apps or online maps before your trip to save time.
Step 2: Making the Purchase
Once in the store, ensure your total exceeds 5,000 yen (~$32 USD pre-tax) to qualify for tax-free status. Present your passport (original with entry stamp—US citizens enter visa-free) at checkout, and they'll deduct the 10% consumption tax instantly.
What happens next:
Sign a form confirming export and no in-Japan use/resale.
The store seals the package with a tax-free sticker (may attach a receipt to your passport).
Keep all receipts safe—they're crucial for warranties or customs.
Restrictions: Items must stay sealed until departure, but from experience, only consumables (like film) require strict sealing. The camera body itself is often fine to use during your trip if not bundled with restricted add-ons. No quantity limits for personal use, but excessive buys might raise eyebrows.
My purchase? Quick and seamless—15-20 minutes extra for tax-free processing.
Step 3: Clearing Customs in Japan
Heading out? At the airport, use the new kiosks (rolled out around mid-2025) for a breeze: Scan your passport, answer questions, and it links your tax-free items. No major inspections for standard cameras—consumer electronics slide through easily.
If the kiosks are glitchy (they're still new), staff can assist. Pack receipts in your carry-on!
Step 4: Arriving in the US and Clearing Customs
Back home, fill out CBP Form 6059B on the plane or via the Mobile Passport app. Declare your camera's value alongside other acquisitions—families can combine exemptions (e.g., $1,600 for a couple).
Details:
Under $800 per person (after 48+ hours abroad) Duty-free.
Under 48 hours? Limit drops to $200.
Over limits? Base duty on cameras is 0%, but tariffs on Japanese imports could add 10-25%—check USITC.gov or CBP for current rates.
Present to officers; they might inspect bags. Required: Passport, CBP form (itemize if over exemptions), and receipts. For high-value items (> $2,500), a formal entry might apply, but unlikely for one camera.
Pro tip: Exemptions reset every 31 days; mailed gifts have a $100 duty-free cap.
Duty-Free Restrictions and Tips
Consumables: Film or batteries? Buy separately—stores seal them tamper-proof, and they can't be used in Japan.
Prohibited Items: No bans on standard cameras, but skip non-FCC certified gear or restricted tech (e.g., drones face strict rules).
Using Your Camera in Japan: Yes! As long as no duty-free consumables are bundled, snap away during your vacation.
Time and Cost: Tax-free adds 10-30 minutes; US customs, 15-60 depending on lines.
Extra Advice: For pricey buys (> $800), consider shipping—but expect full tariffs. Verify charger voltage, video formats (US is NTSC; Japan might be PAL), and menus/manuals (some are Japanese-only).
The Fun Part: Selecting Your Camera
Japan's integrity shines—descriptions are spot-on, and gear is often mint. Whether chasing a vintage Nikon like I did or a modern digital body, test it out (language permitting) and enjoy the hunt.
Final Thoughts
Buying a camera in Japan transformed my vacation into a gear-upgrade adventure, and with these hacks, it can do the same for you. Safe travels, happy shooting, and remember: declare everything to avoid fines!
If this post sparked ideas, watch the full video above or drop questions in the comments. For more photography tips, subscribe to my channel and follow along on socials.
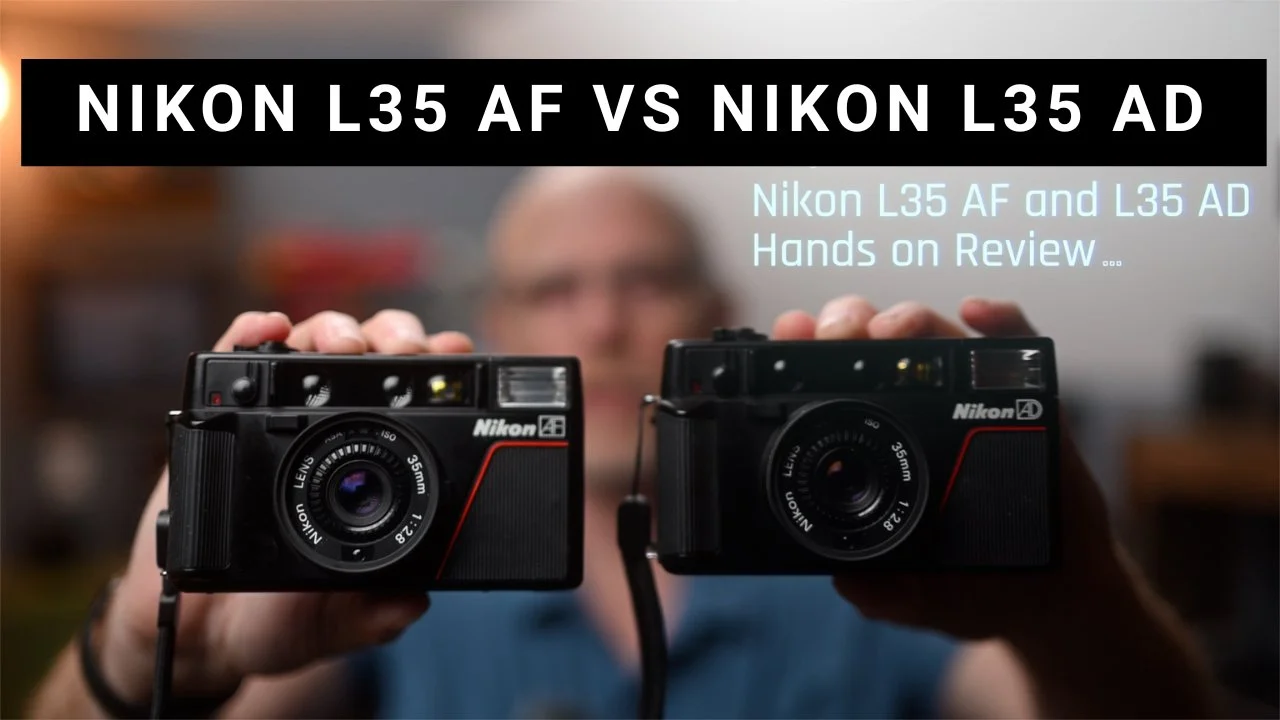
Ultimate Nikon L35 AF & AD Review: Unlock '80s Analog Magic on a Budget
If you're a film photography enthusiast or vintage camera collector, the Nikon L35 AF and L35 AD might just be the compact powerhouses you've been overlooking. In my latest YouTube video, I dive deep into these 1980s point-and-shoot gems, sharing a hands-on review complete with a riverwalk photo walk using Kodak Pro Image 100 for real-world comparisons. Whether you're new to analog or a seasoned shooter, this post expands on the video's key insights, from step-by-step operation to pros, cons, and buying tips. Watch the full review below for visuals and demos—it's packed with practical advice to help you decide if one belongs in your kit!
Why These '80s Nikons Still Shine in 2025
Released in the early 1980s, the L35 AF (and its date-back sibling, the AD) were Nikon's foray into affordable, user-friendly point-and-shoots. They boast a sharp 35mm f/2.8 lens, reliable autofocus, and a compact design that slips into your pocket—perfect for street photography or travel. In the video, I loaded both with Kodak Pro Image 100 (a vibrant, medium-grain color film) and tested them side-by-side on a scenic riverwalk. The results? Punchy colors and impressive sharpness that rival more expensive setups. These cameras prove that pro-level film shots don't require bulky gear.The main difference? The AD adds a data back for imprinting dates/times on your negatives—handy back then, but limited to 2009 (it rolls over to 1980 after). If you snag an AD, just remove the LR44 batteries if the date function isn't crucial.
Step-by-Step Operation: From Setup to Shooting
One of the video's highlights is the practical walkthrough—here's an expanded guide to get you started quickly.
Installing Batteries: Pop open the flimsy bottom door (a common weak point—check for damage when buying). Insert two AA batteries, tucking them securely. Pro tip: Avoid models with broken doors; many end up taped shut. Switch the top lever to "on," and listen for the autofocus whir.
Loading Film: Slide down the back latch to open. Drop in your 35mm canister, pull the leader to the marked spot, close, and advance to frame 1. The red indicator confirms it's loaded. For unloading, use the two-button rewind on the bottom—it leaves the leader out for easy darkroom access.
Setting ISO: Twist the lens ring (remove any filter first) to match your film's speed—up to ISO 1000 on later models (earlier ones cap at 400). Always protect the lens with a 46mm filter; it's recessed and prone to scratches.
Shooting Basics: Frame through the viewfinder (with parallax lines for close-ups). Half-press the shutter for autofocus (hear the motor engage), then full-press to shoot. The meter sensor inside the filter ring adjusts for attachments like polarizers.
Flash and Fill Light: The pop-up flash (guide number 10) activates in low light—cover it with your finger to suppress if unwanted. For backlit subjects, hold the side button for +2 EV compensation to avoid silhouettes. Outdoors? Force the flash by covering the lens briefly for fill.
Advanced Features: Engage the self-timer lever for group shots (red light flashes at 3 seconds). For recompose: Half-press to lock focus, then shift framing—great for rule-of-thirds compositions. Tripod socket on the bottom supports stable setups.
In my tests, these features held up well in varied lighting, delivering vibrant results on Pro Image 100.
Pros, Cons, and Real-World Performance
Pros:
Optics and Autofocus: The f/2.8 lens is tack-sharp; AF is quick and accurate for its era.
Compact and Portable: Pocket-sized with solid build (minus the battery door).
Versatile Metering: Handles filters seamlessly; +2 EV button is a lifesaver for tricky scenes.
Affordable: eBay prices hover at $200-250 for the AF, $175-225 for the AD—great value for beginners.
Cons:
Battery Door Fragility: Often broken; inspect carefully.
Limited ISO Range on Early Models: Stick to later versions for flexibility.
Data Back Limitation (AD Only): Useless post-2009—treat it as a bonus, not a must-have.
No Modern Perks: Single AF point, no burst mode—it's pure analog simplicity.
During the photo walk, both cameras excelled in natural light, capturing the river's details with minimal grain. Side-by-side scans showed near-identical performance, proving the AD's extra feature doesn't compromise quality.
Buying Tips and Where to Find Them
Hunt on eBay or vintage shops for tested units—aim for ones with intact battery doors and lens caps (rare but worth it; 3D prints are an option but fit poorly). Test autofocus and flash before committing. If you're into bulk loading or home developing, the leader-out rewind is a huge plus.
Current market: With analog's resurgence, prices are steady but expect to pay a premium for mint condition. Pair with films like Pro Image 100 for punchy colors or push to higher ISOs for low-light.
Final Verdict: Worth Adding to Your Collection?
Absolutely—if you want effortless, high-quality film shooting without the hassle of SLRs. These Nikons blend nostalgia with reliability, making them ideal for casual outings or as backups.
What do you think—have you shot with an L35? Share in the comments below or on the video. For more reviews and photo walks, subscribe to my channel and stay tuned!
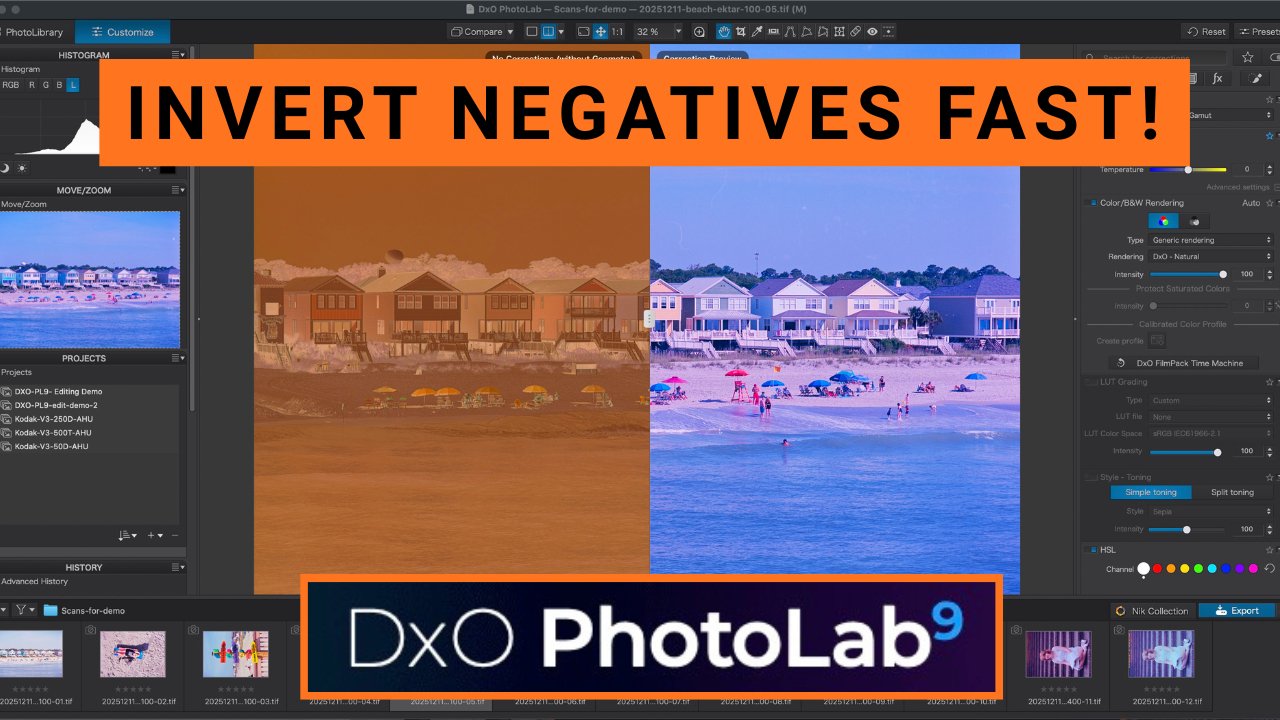
Mastering Color Negative Scanning: Invert & Optimize in DxO PhotoLab 9
Diving into film photography often means dealing with the digital side—scanning negatives and converting them to positives. If you've ever scanned color film like Kodak Ektar 100 or Portra 400 and struggled with that stubborn orange mask or inconsistent colors, my latest YouTube tutorial is here to help. In the video, I walk through the process using DxO PhotoLab 9's scanned film optimization tools, from basic inversion to creating custom presets for batch processing. This companion blog post breaks it down further, with expanded tips and insights for film enthusiasts. Watch the full guide below for hands-on demos, and grab a 15% discount on DxO software with code EDALDRIDGE15!
Why Scan and Invert Color Negatives?
Color negatives capture beautiful, vibrant images, but scanning them as positives often results in inverted colors dominated by an orange cast from the film's base layer. Tools like DxO PhotoLab 9 simplify this, turning raw scans into editable positives without third-party plugins. In the video, I use scans from an Epson Perfection V850 flatbed scanner on Ektar 100 (from a Pentax 645NII) and Portra 400 to demonstrate real-world results. The goal? Efficient workflows that preserve film's unique look while allowing creative tweaks.
Whether you're digitizing old family rolls or archiving pro shoots, mastering this saves time—especially with presets tailored to specific film stocks.
Step-by-Step: Inverting and Optimizing in DxO PhotoLab 9
The video focuses on practical steps; here's a detailed breakdown to follow along.
Prepare Your Scans: Scan negatives as positives (no auto-inversion) for maximum control. I recommend flatbeds like the V850 or DSLR/mirrorless setups for high-res results. Load your RAW scans into PhotoLab.
Invert the Image: Navigate to the "Color" tab. Under HSL, find "Scanned Film Optimization" (it may be grayed out—click to activate). Hit "Invert the Negative Image." This flips the image linearly (light to dark, dark to light), but colors will look off initially.
Choose a Starting Preset: DxO offers presets (e.g., Linear, #1-13). Ignore colors at first—focus on contrast. For punchy films like Ektar 100, try #13 for an S-curve boost. For low-contrast stocks like Portra 400, start with #1. Preview the curve graph to see the impact.
Adjust RGB Curves for Color Correction:
Red Channel: Often the culprit for casts. Pull highlights/shadows toward green to neutralize reds (e.g., in skin tones or bricks).
Green Channel: Add a control point on neutral areas; shift toward magenta for balance.
Blue Channel: Move toward yellow to fix cool tones. Make small adjustments—big moves can overcorrect. Zoom into skin, sand, or neutrals for accuracy.
Fine-Tune and Save Presets: Once satisfied, save via the preset dropdown (e.g., "Ektar 100 Normal," "Ektar 100 Vibrant," "Ektar 100 Skin Tones"). This creates reusable profiles for batch edits. For Portra, aim for subtler contrasts to match its natural look.
Apply to Batches: On new images, invert, then select your preset. Tweak as needed for scene variations (e.g., more saturation for vibrant shots).
In my tests, Ektar scans turned punchy and contrasty, while Portra stayed soft and true-to-life—proving the tool's versatility.
Tips for Better Results
Film-Specific Presets: Create variations (normal, vibrant, skin-focused) for each stock. Ektar loves high contrast; Portra needs subtlety.
Common Pitfalls: Avoid over-editing curves—small shifts suffice. If scans look "off," check scanner settings (e.g., disable auto-corrections).
Hardware Pairings: Use with scanners, DSLRs, or even smartphones for digitizing.
Post-Inversion Edits: After conversion, use PhotoLab's full suite (HSL, noise reduction) for final touches.
Discount Alert: Try PhotoLab 9 with EDALDRIDGE15 for 15% off—ideal for analog-to-digital workflows.
Final Thoughts: Elevate Your Film Digitization
This process transformed my scanning routine, cutting hours while boosting quality. If you're into analog photography, give it a shot and share your results in the video comments. What's your go-to film stock for scanning?
For more tutorials on film editing, photo walks, and gear reviews, subscribe to my channel and hit the bell. Questions? Drop them below!

Effortless eBay Imports: Snag Mint Vintage Film Cameras from Japan Without the Hassle
If you're a film photography fan eyeing that pristine Nikon F5 or another vintage gem, buying from Japan on eBay might seem daunting—scams, tariffs, and shipping woes? Not anymore. In my latest YouTube video, I break down the entire process step-by-step, drawing from my experience importing over 40 cameras and lenses with zero regrets (unlike that corroded Nikon F3 from a US seller). This companion blog post expands on the video's tips, from spotting deals to navigating US customs in 2025's tariff landscape. Watch below for real eBay demos and examples—perfect for analog enthusiasts building their collection on a budget!
Why Import Vintage Cameras from Japan?
Japan's market is flooded with high-quality, well-preserved gear at competitive prices—often better condition than US listings. Sellers there treat cameras like treasures, cleaning and checking them meticulously before sale. In the video, I share how I've imported dozens without issues, contrasting it with a bad US buy. The result? Mint examples that feel like new, sometimes with fun bonuses like origami or candy in the box. If you're into SLRs like the Nikon F5 or FM series, this is your goldmine.
Step 1: Assessing Gear Condition
Japanese pride in quality shines here—it's cultural. Items are typically spotless, with accurate descriptions. US gear? Often overpriced and worn. Pro tip: Zoom into photos and read listings carefully. Look for "near mint" or "minimal signs of use." In my video example, I inspect a Nikon F5 listing: Check pentaprism edges for brassing, grips for peeling, and shutter curtains for creases. If anything's off, skip it—the market has plenty of pristine options.
Step 2: Shipping Made Simple
Don't fear international shipping—it's often faster than domestic! DHL and FedEx deliver quickly; I've had Japan packages arrive before US ones ordered the same day. Packaging is top-notch, like fragile art. Opt for insured options on valuables, and track everything. Costs? Around $30 for expedited—worth it for peace of mind.
Step 3: Demystifying Customs, Tariffs, and Fees
The big hurdle. Post-2025 changes mean no more $800 duty-free threshold for shipped items. For 35mm SLRs (HTS code 9006.53.02.05), expect a 15% tariff on Japanese imports under the US-Japan agreement—superseding the old "free" rate.
Breakdown:
Merchandise Processing Fee (MPF): $2.69-$12.99 for under $2,500 shipments.
Carrier/Broker Fees: $12+ for duties paid on your behalf (e.g., UPS charges if not prepaid online).
Other Possible Fees: Storage/return if issues arise; agency fees for regulated items (rare for cameras).
Verify via USITC.gov or CBP—sellers may handle it but could upcharge. Total? Still a steal for mint gear. Manually calculate to avoid surprises.
Step 4: Smart eBay Searching
Use eBay's advanced search: Enter your model (e.g., "Nikon F5"), set location to Japan, sort by ending soonest for auctions. Check seller ratings—aim for 99%+ with 100+ sales. In the video, I demo: Avoid low-feedback sellers; look for "import fees included" to skip surprises. For digital/vintage hybrids, confirm compatibility: NTSC video, English menus, 120V chargers (film cameras rarely have issues).
Step 5: Visual Inspection via Photos
Photos are your lifeline—treat them like crime scene evidence. Zoom in for:
Dents, brassing (edges, buttons).
Dust/scratches on lenses.
LCD bleed or rubbed markings.
Bottom plate wear (sign of hard use).
Pressure plate and shutter integrity.
Video examples show a near-mint F5: No touch-ups, clean grips—buy with confidence if it matches the description.
Final Tips and Verdict
Compatibility Check: Film cameras are fine; digital? Verify HDMI, power, language.
Post-Purchase: Test on arrival; eBay's protection covers fakes.
Worth It? Absolutely—better quality, lower prices, fun experience. I've had zero regrets in 40+ imports.
Ready to hunt? Share your finds in the video comments! For more gear guides and analog tips, subscribe and like.
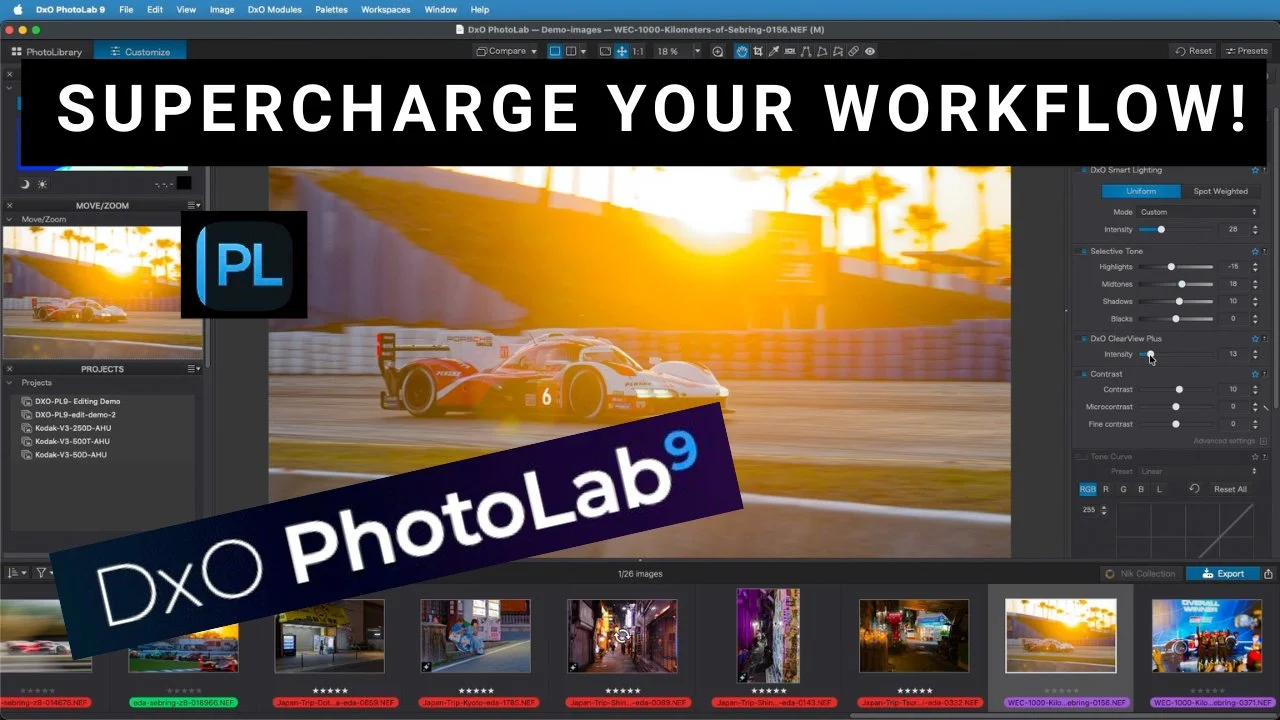
Supercharge Your Sports & Editorial Workflow with DxO PhotoLab 9
If you're a sports or editorial photographer juggling endless RAW files under tight deadlines, DxO PhotoLab 9 might just be the workflow savior you've been waiting for. In my latest YouTube video, I dive into its automatic baseline editing tools, showing hands-on demos of Smart Lighting, ClearView Plus, and Deep Prime XD to slash editing time while delivering pro results. This companion blog post expands on the key features from the video, with extra tips for high-volume shooters. Watch below for the full tutorial, and use code EDALDRIDGE15 for 15% off any DxO software!
Why DxO PhotoLab 9 is a Game-Changer for Busy Photographers
In chaotic shoots like sports events or editorial assignments, time is everything. PhotoLab 9's AI-driven automatic baseline editing kicks in instantly, analyzing optics, sensor data, and scene content to apply smart corrections—no manual basics needed. This sets a perfect starting point, freeing you for creative tweaks. As I highlight in the video, it's ideal for varying light conditions or ensuring consistent looks across batches.
Feature Breakdown: Hands-On Demos
The video focuses on three powerhouse tools; here's a deeper dive with practical advice.
Smart Lighting: Balance Exposures Effortlessly
This is your go-to for taming shadows and highlights without clipping details. In the demo, I use a dusk shot with deep shadows on a car but glowing sun and lights in the background. The default edit looks decent, but bumping the intensity slider reveals hidden details instantly—making the image pop in seconds.
Tip: For outdoor sports with shifting light, start here. It's one-slider magic that handles high-contrast scenes like pros.ClearView Plus: Cut Through Haze for Crystal Clarity
Tackle atmospheric haze and boost local contrast with this dehaze-like tool. My example? A driver shot through a windscreen, full of reflections and murk. The base edit is hazy, but sliding ClearView Plus sharpens edges, enhances colors, and clears distractions—all in under two seconds.
Before/after: From flat and foggy to vibrant and detailed.
Tip: Editorial shooters dealing with urban smog or indoor glare—apply this early for cleaner files ready for quick exports.Deep Prime XD: Noise Reduction Magic for Low-Light Shots
For high-ISO noise in night or indoor scenarios, Deep Prime XD is unbeatable. In the video, I preview an ISO 6400 night shot with vending machines and car lights—dark ambient conditions. It transforms grainy messes into clean, usable images without losing texture.
Tip: Batch-apply this on event coverage; it's AI-powered and far superior to competitors for preserving details.
Real-World Workflow Tips
Batch Processing: Load a folder, and PhotoLab applies optics corrections and base edits automatically—perfect for 100+ files from a game.
Before/After Comparisons: As shown, these reveal massive improvements with minimal effort. Always preview at 100% zoom for noise checks.
Integration: Pair with your camera/lens profiles for tailored results; it's seamless for Canon, Nikon, etc.
Free Trial & Discount: Test it via www.dxo.com/dxo-photolab/download/. Use EDALDRIDGE15 for 15% off to upgrade your setup.
Final Thoughts: Transform Your Editing Game
PhotoLab 9 isn't just software—it's a time-saver for pros facing deadlines. If this sparks ideas for your workflow, share in the video comments!
For more tutorials, gear reviews, and photography hacks, subscribe and hit the bell. Questions? Drop them below. Happy editing!
Kodak Vision3 AHU First Look: Remjet-Free Revolution for Film Photographers?
Film photography just got a major upgrade with Kodak's Vision3 AHU—the remjet-free version of their iconic motionpicture stock. In my latest YouTube video, I give a hands-on first look: unboxing, shooting a roll on my Nikon F6, home-developing with standard C-41 chemistry, and scanning the results. If you're tired of messy remjet but crave that cinematiclook, this could change everything. This companion blog post dives deeper into the video's insights, from what AHU meansto real-world performance on stocks like 50D, 250D, and 500T. Watch below for the full demo, and subscribe for upcomingdeep dives like night shoots and comparisons!
What is Vision3 AHU and Why the Hype?
Kodak Vision3 is beloved for its fine grain, vibrant colors, and cinematic tones—think Hollywood films. The catch? Traditional versions have a remjet backing that protects against halation but requires special removal during development, often leading to messy tanks or lab fees. Enter AHU (Anti-Halation Undercoat), a remjet-free innovation that lets you process it like any color negative film using standard C-41 chemistry at home.
In the video, I unbox fresh rolls of 50D, 250D, and 500T AHU. These are daylight (D) and tungsten (T) balanced stocks, with ISO ratings from 50 to 500. The packaging is sleek and pro-grade, and the film loads like any 35mm canister—no surprises there.
Shooting Experience: Metering and Real-World Tests
I wasted no time: Loaded the rolls into my Nikon F6 and hit the streets at dawn for varied lighting. Shot the 500T first in low light (no sun yet), switched to 250D as the glow built, and finished with 50D in full sun. No filters for the initial test—shot at box speed to see performance.
Key takeaways:
Handling and Metering: Meters beautifully; the F6's matrix metering nailed exposures. For 500T in daylight (tungsten-balanced at 3200K), expect a blue cast without an 85B filter—Kodak recommends rating it at 320 ISO with the filter for correction. I skipped it here but plan a filtered test soon.
Dynamic Range and Contrast: Excels in high-contrast scenes. Dawn shots with deep shadows and bright skies showed no blown highlights or crushed blacks—far better than consumer films.
Halation and Flare: Minimal blooming around lights (e.g., street lamps showed slight halation in one angle, but nothing excessive). Sun flares were controlled, adding a subtle cinematic glow without it being overwhelming.
Pro tip: For best results, use a quality lens and avoid direct sun—AHU's anti-halation layer shines in mixed lighting.
Home Development: C-41 Simplicity
No remjet means no pre-wash hassle! I developed the film using standard C-41 kits: A quick pre-wash, then normal processing. Total time: Under an hour (including film drying), with no black gunk in the tank.
If you're new to home dev, AHU lowers the barrier—perfect for enthusiasts wanting cinematic results without ECN-2 chemistry or having to remove the remjet coating.
Scan Results: Colors, Grain, and Wow Factor
Scanned on an Epson Perfection V850 with SilverFast software (using Kodak Gold 200 profile as a base—no dedicated Vision3 yet). Tweaked white balance on neutrals for accuracy.
50D (Daylight, Low ISO): Ultra-fine grain, punchy colors, and insane sharpness. Handles bright sun and shadows flawlessly—ideal for landscapes or high-detail work.
250D (Daylight Balanced): Vibrant tones with pleasing grain. Dawn shots showed gorgeous pinks and oranges; high contrast (e.g., shadowed buildings vs. sunny facades) rendered beautifully.
500T (Tungsten, High ISO): Fine grain for 500 ISO; blue cast in daylight (as expected without filter), but corrects easily in post. Low-light alleys and pre-sunrise scenes popped with minimal noise.
Overall: Grain is tight and cinematic, colors natural yet vivid, and dynamic range rivals pro stocks. Some abstract shots (e.g., fountains, reflections) highlighted its artistic flair.
Drawbacks and Availability
It's not perfect—stock is hard to find right now (grab it when you can). The 500T needs that filter for daylight accuracy, and while grain is fine, it's not zero-noise digital. But for the price and ease? Game-changer.
Final Verdict: A Must-Try for Analog Fans
Vision3 AHU delivers pro motion picture quality without the remjet pain—I'm hooked and planning more tests. If you're into film, this could replace stocks like Portra for cinematic vibes on a budget. Thoughts? Switching to AHU? Share in the comments below or on the video!
For more film reviews, dev tips, and analog adventures, subscribe and like. Questions welcome!
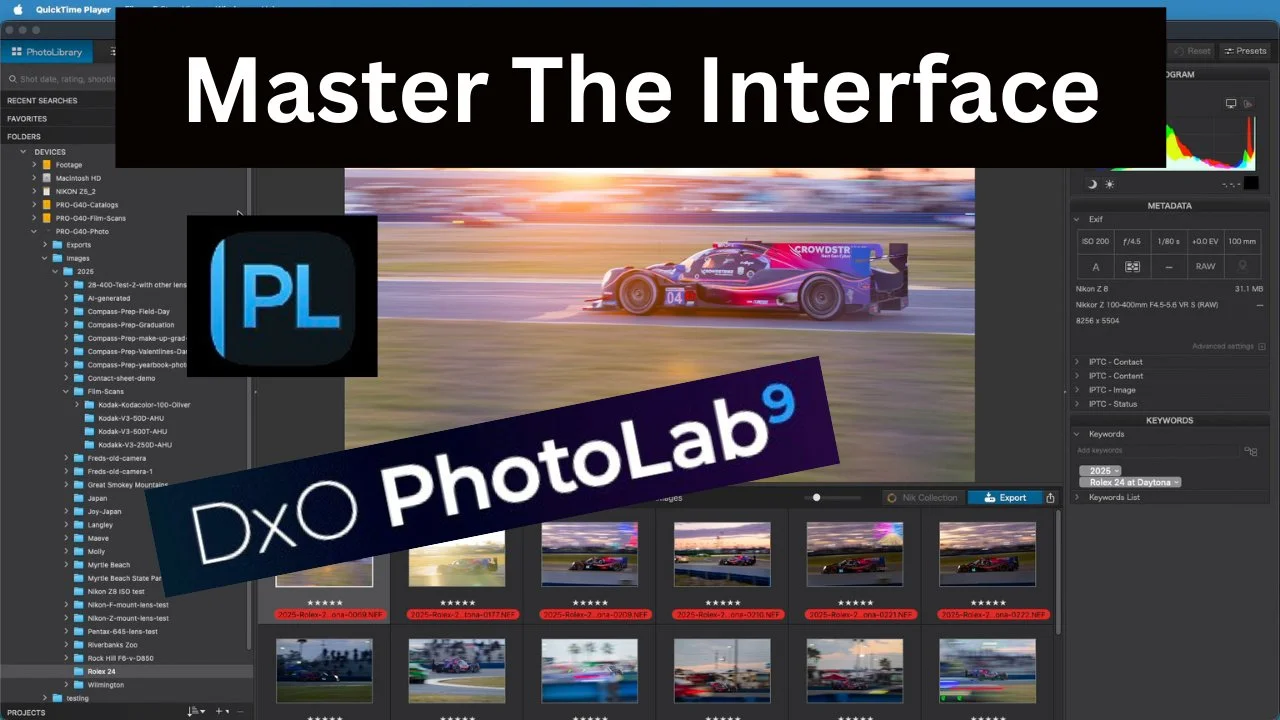
Mastering the DxO PhotoLab 9 Interface: Effortless Navigation for Faster Edits
If you've ever felt overwhelmed by the buttons and panels in a powerful editor like DxO PhotoLab 9, this guide is for you. In my latest YouTube video, I walk through the basics step-by-step, showing how to navigate from the Photo Library to custom workspaces for a smoother workflow. Whether you're new to PhotoLab or upgrading, mastering the interface can slash your editing time and make the process more enjoyable. This companion blog post expands on the video's tips with extra insights for photography enthusiasts. Watch below for the full demo, and use code EDALDRIDGE15 for 15% off DxO software!
Why Focus on the Interface?
PhotoLab 9 is packed with AI tools like Smart Lighting and DeepPRIME XD, but without knowing your way around, you'll waste time hunting for features. As I mention in the video, starting with the basics—like tabs and panels—turns overwhelmed into efficiency. This is especially useful for high-volume editors (e.g., sports or events) or beginners transitioning from Lightroom. No catalog system here—it's file-based, keeping things simple and direct.
Key Tabs: Photo Library and Customize
The video kicks off with the two main tabs—here's a deeper look.
Photo Library: Your File Explorer
This is where you browse and organize images on your drive—no built-in catalog like Lightroom. Organize folders by year, event, or whatever suits you (e.g., I use yearly folders for easy access).Metadata Search: If you've tagged files (e.g., via Photo Mechanic), search keywords like "2025" or "Rolex 24 Daytona" right in PhotoLab.
Projects and Favorites: Group scattered files into projects for quick access—great for ongoing edits. Add favorites or recent searches for shortcuts.
Customization: Hide/show panels (e.g., histogram) by clicking titles or dragging them. Right-click to toggle visibility—tailor it to your needs.
Customize Tab: Where the Magic Happens
Switch here for editing. Start in "Basic" view for essentials like white balance, exposure, and HSL. For more, jump to "Advanced" via Workspaces.Panels Overview: Exposure (smart lighting, selective toning), Color (white balance, gamut), Denoising (DeepPRIME AI), Geometry (fix converging lines), FX (vignettes, textures), and Masking (local adjustments).
Workspaces: "DxO Standard" keeps it simple; "Advanced" expands options. Star favorites (e.g., exposure, ClearView) and save custom workspaces (e.g., "Ed's Workspace") for one-click setups.
Top Toolbar Tools: Crop (with aspect ratios like 5x4 for 8x10 prints), Leveling, Healing (dust spots), Red-Eye. Hit "Close" to apply crops.
Pro Tips for Customization and Efficiency
Active Corrections: Click this button to see only changed settings—speeds up reviews.
Undo/Reset: Ctrl+Z (Windows) or Cmd+Z (Mac) steps back; reset filters if images vanish (e.g., click the filter icon and hit "Reset").
Auto Defaults: PhotoLab applies conservative base edits on import—no need for manual autos like in Lightroom.
Zoom and Compare: Double-click for 100% view; toggle denoising to check noise reduction (e.g., at ISO 125, it's subtle but effective).
Integration Ideas: Pair with Photo Mechanic for metadata, then edit here. For denoising, it's top-tier—preview off/on to see the AI magic.
In the video, I demo customizing panels and workspaces—try it yourself for a personalized flow.
Final Thoughts: Level Up Your Workflow
Mastering PhotoLab 9's interface isn't just about buttons—it's about editing faster and smarter. If this helps your setup, share your custom workspaces in the comments below or on the video! For more tutorials on DxO tools, film scanning, and gear reviews, subscribe and hit the bell.
Questions? Drop them here. Happy editing!
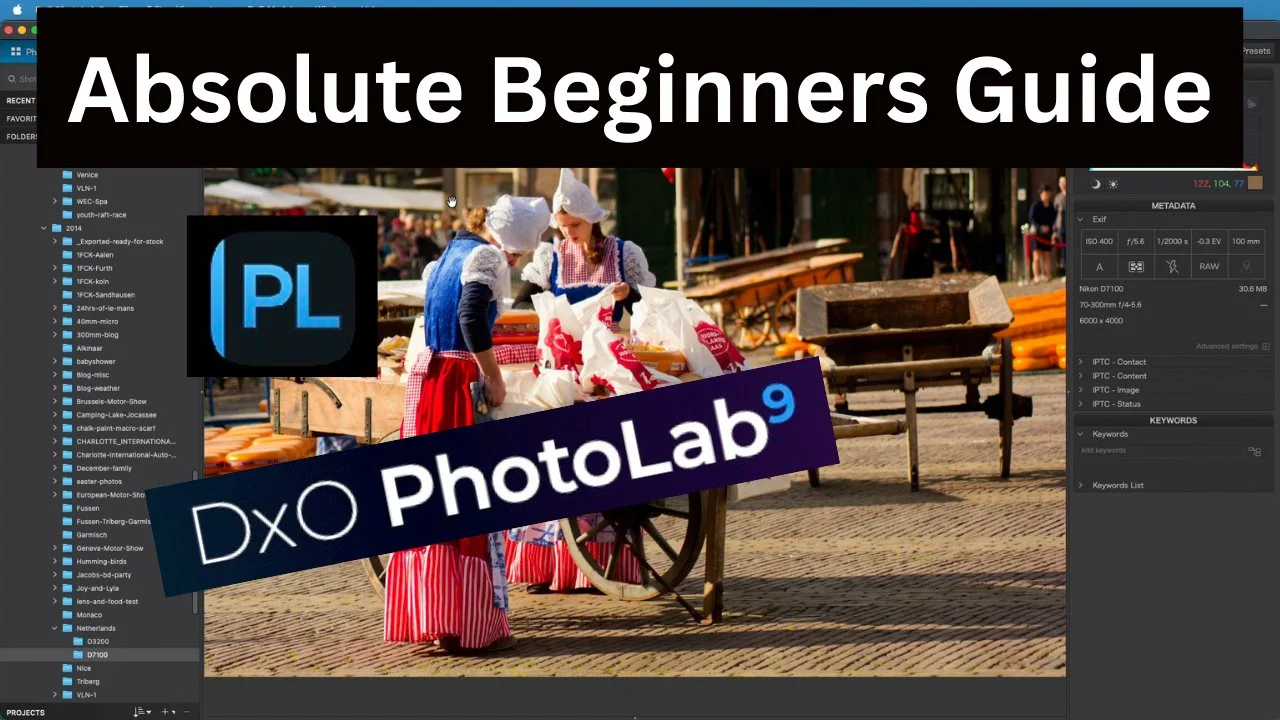
DxO PhotoLab 9 for Absolute Beginners: Easy Setup & Editing Basics (No Catalogs Needed!)
If raw photo editing feels intimidating, DxO PhotoLab 9 simplifies it all—no complex catalogs or databases required. In my latest YouTube tutorial, I guide absolute beginners through the essentials: hassle-free installation, folder-based workflows, automatic corrections, and key tools like Smart Lighting and ClearView Plus for quick, pro-level results. This companion blog post expands on the video's steps with extra tips for photography enthusiasts. Whether you're editing your first landscape or low-light shot, this will get you started fast. Watch below for the full walkthrough, and use code EDALDRIDGE15 for 15% off DxO software!
Why DxO PhotoLab 9 is Beginner-Friendly
Released in September 2025, PhotoLab 9 uses AI for stunning edits without overcomplicating things. Unlike catalog-based editors, it works like your file explorer—browse folders directly and edit on the fly. In the video, I emphasize its conservative defaults: No aggressive changes, just natural enhancements that give you room to tweak. Perfect for transitioning from JPEGs to RAW, where you control every "ingredient" like baking a cake.
Quick Setup: Customize for Efficiency
Start strong with these settings (as demoed):
Go to Settings > General tab.
Enable auto-updates and module downloads—these fetch camera/lens corrections automatically.
Set default presets to "DxO Style Natural" for RAW/RGB images—a solid, subtle base.
For comparisons, choose "No Corrections Without Geometry" to see raw vs. edited differences.
These tweaks ensure PhotoLab loads images ready-to-go, saving time for creativity.
No Catalogs: Simple Folder Browsing
PhotoLab shines in its simplicity—no importing photos into databases. Use the Photo Library tab like File Explorer: Navigate drives, folders (e.g., by year or event), and preview images. Search metadata (e.g., keywords from Photo Mechanic) or create projects/favorites for quick groups. It's intuitive—select, edit, export. In the video, I show how seamless it is, and how well it works on older files.
Auto Corrections: Built-In Magic
PhotoLab applies smart fixes on load:
Optics Modules: Download for your camera/lens combo (80,000+ supported). Fixes distortions, vignetting—demo shows before/after on a sample image.
Default Processing: Conservative and natural, mimicking in-camera JPEGs but with RAW flexibility. Compare modes (side-by-side or split) reveal subtle enhancements without overdoing it.
Key Tools for Quick Edits
We focus on three essentials in the Customize tab—perfect for beginners.
Smart Lighting: Balance Shadows & Highlights
Under the Light panel, this AI tool subtly lifts shadows (default intensity ~15). Demo: Turn it off/on to see minor but impactful changes—no clipping, just even exposure.ClearView Plus: Dehaze & Clarity Boost
Like Lightroom's Dehaze but smarter—default at 10 for haze removal and local contrast. Slide up to 43 for dramatic effects, but less is more. Great for foggy landscapes or urban shots.DeepPRIME XD: AI Noise Reduction
In the Detail panel, this denoises high-ISO images while sharpening details. Preview at 100% zoom to appreciate the clean results—ideal for low-light photography.
Other panels (Color for white balance, Geometry for fixes) are there, but start simple.
Workflow Tips & Demos
Compare Modes: Use split views to evaluate changes—grab the divider for interactive previews.
Undo/Reset: Ctrl+Z (Win)/Cmd+Z (Mac) for steps; reset panels if needed.
Export: Once edited, output JPEGs for socials—no fuss.
Video Demos: See real adjustments on sample images, like boosting shadows under a boat or clearing haze.
Final Thoughts: Start Editing with Confidence
PhotoLab 9 demystifies RAW for beginners—setup in minutes, edit in seconds. If this boosts your workflow, share your first edit in the comments below or on the video! For more DxO tutorials, film tips, and gear reviews, subscribe and like.
Questions? Drop them here. Happy editing!

Relaunching My Website: A Fresh Perspective on Photography
A new direction
Welcome back, everyone! I’m thrilled to announce the relaunch of my website, edaldridge.com. With a fresh new look, the site now serves as a comprehensive resource for photography enthusiasts. Here’s what you can expect:
A Fusion of Analog and Digital Photography
Photography is an art form that has evolved tremendously with technology, yet the charm of analog photography remains timeless. On my relaunched website, I delve into the nuances of both worlds. Analog photography offers a tactile experience, with film choices and development techniques that add a unique, personal touch to each shot. I share insights on selecting the right film for different lighting conditions and the joy of darkroom development. On the flip side, digital photography provides immediate feedback, extensive post-processing options, and the convenience of digital storage. My blog posts now cover photography gear reviews, software tips, and how to blend digital enhancements with analog aesthetics for stunning results.

How-To Tips for Photographers
Whether you're a seasoned photographer or someone who just picked up a camera, this "how-to" section is designed to enhance your skills across various aspects of photography. Topics will include the exposure triangle and crreative controls of the camera, composition, lighting, visual story telling and everything in between. The photograph is not finished in the camera so there will be plenty of how-to tips for the digital and analog “darkroom” processes. By mastering the areas of composition, the exposure triangle, lighting, and both digital and analog darkroom techniques, you'll be equipped to capture the perfect moment and edit your photos to tell a compelling story, whether you're working with the latest digital camera or a classic film camera.
Destinations and Inspiration
Exploring new destinations isn't just about traveling; it's a profound source of inspiration for photographers. Each location, from the bustling streets of Tokyo to the serene vistas of the Scottish Highlands, offers unique light, colors, and subjects that challenge and expand your photographic vision. Whether you're capturing the golden hues of an Italian village at sunset or the stark, minimalist beauty of Iceland's landscapes, every journey adds a new layer to your creative palette. These experiences fuel your imagination, encouraging you to experiment with different techniques, compositions, and even film types in analog photography. The diversity of environments you encounter can push you to break from your usual methods, leading to innovative images that reflect not only the beauty of the world but also your personal growth as an artist. Thus, each trip becomes not just a collection of photographs but a journey of inspiration, pushing the boundaries of what you thought possible through your lens.
Reviews
New and used equipment reviews will be included on the site as well to help you decide if a piece of gear will work for you or not. These will not be scientific but rather a real world review of what you can expect. Reviews of film and processing chemicals and darkroom kit will not be left out.
Join the Journey
I invite you all to explore the revamped edaldridge.com, where every click takes you deeper into the world of photography. Whether you're here to learn, to share, or to find inspiration, there’s something for everyone. Let’s capture moments that last a lifetime together.
Stay tuned for more updates, and as always, keep shooting!